While overall our kids have done pretty well at the dentist, they haven’t been cavity free. For close to a quarter of a century, I’ve requested that their dentists use white dental composite instead of amalgams. I’ve repeatedly been told that the amalgams are much stronger and will last longer, but I haven’t wanted toxins (the EPA classifies amalgams as hazardous waste) put directly in their mouths and have continued to insist on composite.
I was surprised at a recent visit to a new dentist, when I made my usual request, to be told that amalgams are no longer used. ‘Why not?’ I asked, surprised. He shrugged and said that they’re no longer on the list of materials recommended by the Ministry of Health or covered by the health clinics. ‘But amalgams are stronger!’ I said. ‘No, composite fillings are perfectly strong,’ he reassured me.
It was a little unsettling to have this change be shared so matter-of-factly, as if he was stating the obvious – as if there hadn’t been a decades long policy to use amalgams. I almost feel like there should be a public announcement: we have finally realized we were wrong about our insistence on routinely using amalgams and we have changed our policy accordingly.
I went on to discuss amalgams with him, and told him my husband was looking for someone experienced in replacing the fillings from when he was young. The concern with the presence of amalgams is that they are the source of the slow release of toxins (including mercury) into the body. Here’s more information about this.
Getting the amalgams out is just one part of correcting the problem. The other is to get the highly toxic accumulated mercury out of the body. I remember the first time I ever heard anything about this topic; over 25 years ago on the way to work a fellow commuter told me she was having all of her amalgams removed. It was part of an extensive healing process.
Our new dentist told me there’s a biological dentist in Tel Aviv who specializes in this work. We did a little searching and my husband made an appointment right away. This isn’t the kind of work that should be done with a regular dentist, who isn’t familiar with safety protocols in having amalgams removed. When removing amalgams, mercury vapors can be released into the air, then reabsorbed by breathing into the lungs, and removing the amalgams without protective procedures in place can actually harm a person’s health more than leaving them in.
In the last month, over the course of two appointments my husband had all of his amalgams removed. He is very grateful to have found a dentist experienced in this work and so glad to have this taken care of, after a very long time of thinking about it.
If you’re wondering about how much this kind of work costs: the removal and replacement of each filling costs 750 shekels.
Over the last couple of years my son told me he really wanted to get goats, and I adamantly and repeatedly told him, “No, we don’t have enough room,” and offered rabbits as an option. He agreed but that wasn’t what he wanted and after a year gave them away.
In the meantime, he has helped friends take care of their goats and learned to milk them.
For the last few months I’ve been noting how much space owners set aside for two or three goats, and it’s less than I thought was necessary. I spent a long time thinking about if I was willing to change the look of my yard to make room for two milk goats and a pen for them. I started to slowly find the idea more doable and acceptable.
Until recently, I had hoped we could rent or buy some land adjoining us. One person was willing to lease us the entire plot of five dunam but only for a year and for five times the going price for agricultural land. The other didn’t want to lease or sell any land. The thought behind having more land was so we could raise some animals and practice permaculture principles to rebuild the completely depleted chemically farmed soil, and develop some kind of food forest. That would mean investing in fencing and many other significant start up expenses, that we wouldn’t be willing to do without a long term lease.
I realized if I scaled down my vision, I could do some of those things in my yard right now. But it means giving up – to some degree – the kind of ‘pretty’ yard I’ve spent time developing.
Why would I want goats? Seventeen years ago I learned about the incredible nutritional benefits of raw milk, and since then have thought how amazing it would be to have our own source of milk. In the US, I traveled every month or two to Pennsylvania, where I bought raw milk directly from a Mennonite farmer, twenty plus gallons at a time.
When I moved to Yavneel, I was able to buy raw goats milk from a local family and was thrilled to let someone else raise the goats and for me to have the benefits. My daughter and I bought all that they had. However, the supply became irregular and then petered out completely.
Healing our very broken industrialized food system begins with supporting local farmers, and there’s nothing more local than producing food yourself! Though milk hasn’t been an important part of our diets since we left the US, when I thought about what would be the best use of our very limited space to raise some of our own food, milk kept coming up as the top option. (Eggs would have been number one, but my son is already raising chickens.)
This is NOT a frugal undertaking. From a strictly economics perspective, it doesn’t save money but this goes beyond money for us, since we see it as an investment in our health. If we had our own raw milk, it would replace other less nutritious things that we currently eat.
So what are the costs involved in getting milk goats?
First is buying the goats – and the costs have gone up quite a bit in the months since we began thinking about this. A good milk goat costs between 1800 – 2000 shekels each. (I asked the goat broker why they’re more expensive than a few months ago, and he said, “Gas has gone up, food has gone up, meat has gone up – why wouldn’t the cost of goats go up?!”) You can buy young female kids for 700 – 1000 shekels but then have to feed them and breed them and wean the babies before you get milk, which costs plenty of time and money.
Then there’s the issue of buying hay. We’re in a shmita year, and can’t buy hay that is currently being grown. There is literally a hay field opposite my house, and a few days ago I watched him bale the hay and stack the bales, thinking how easy and convenient it would be if I could run over to the tractor driver and ask him to drop a bale over the wall into my yard – but I can’t buy any of it. Everyone who had animals who was concerned about shmita issues knew to pre-buy hay for the upcoming year. There’s no hay that I know of available for purchase left from last year – several months ago we found one person who had a few small bales who told us to call him back in a week, since he was out of town. When we called back, he had already sold the non-shmita hay to someone else.
When my son bought his purebred barred Plymouth Rock chickens from a Circassian woman a couple of months ago, I asked her for her hay supplier. I’m allowed to buy hay from a non-Jew, since he’s not violating any Torah laws by growing hay during shmita. She gave me a number, but when I called him, he said he’s no longer selling privately, and all of his hay is now sold directly to a broker. He had no suggestions of anyone else I could speak to.
We have to ask a rav if we’re allowed to feed animals hay that was grown as heter mechira, because that’s what most Jewish farmers have relied on.
Then there’s the cost of animal feed that is going through the roof. You can’t save costs by pre-buying feed, because after a couple of months the weevil eggs inside the grains hatch, multiply, infest the batch and the feed gets ruined.
And of course, we need to be able to house them, and in addition to the pen need a hay feeder and a milking stand – all of which costs more money.
Despite all the costs and logistical challenges, I’m still seriously considering goats. Does that sound crazy?
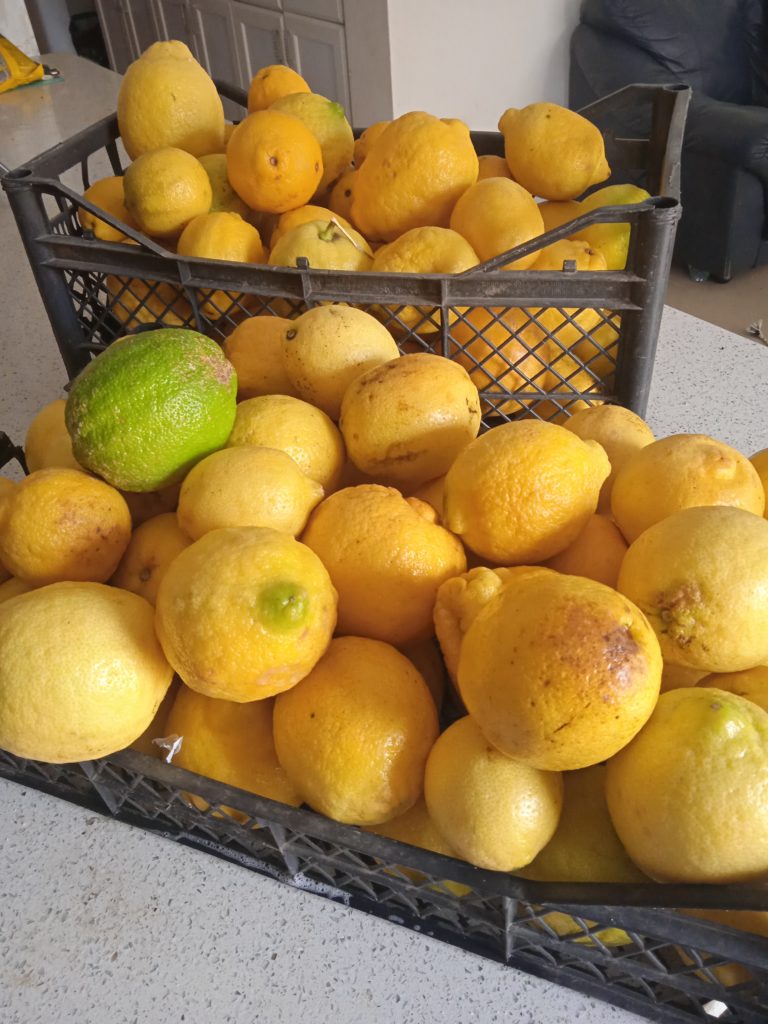
This week I got a windfall of lemons, and decided to process them immediately. I’ve had the unfortunate experience of my produce being left in a bag and put away somewhere outside of the fridge by a zealous child wanting to quickly clean up, and by the time I find it it’s no longer usable. So I decided to seize the moment. 🙂
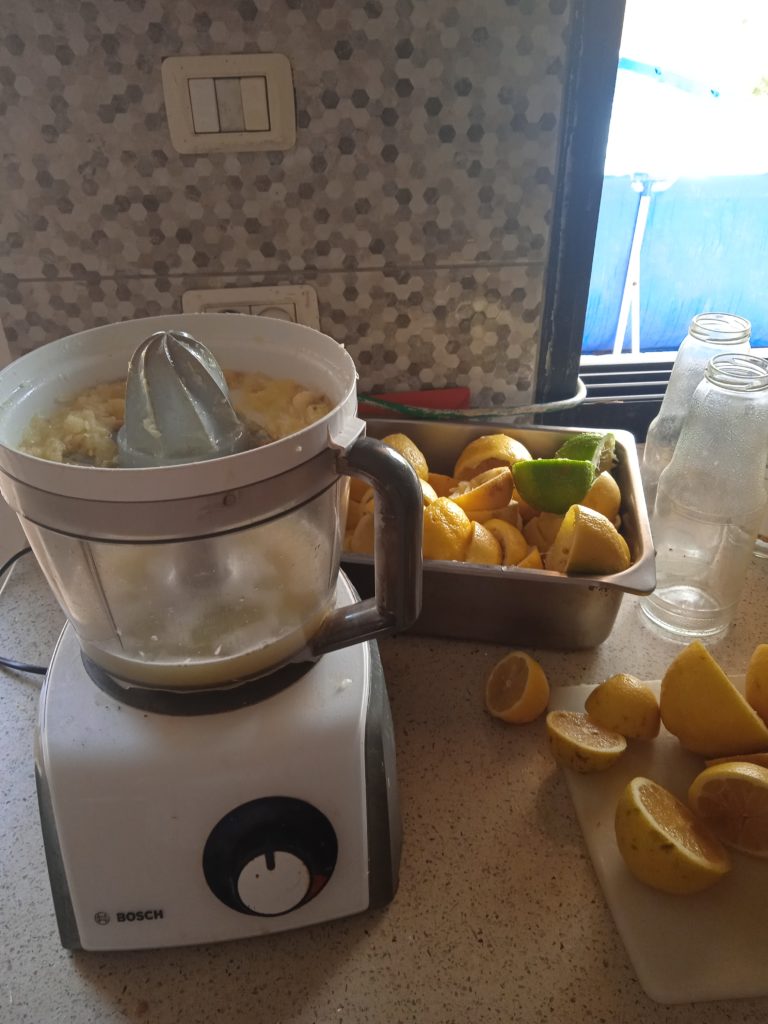
Fortunately, my food processor has a juicer attachment. I bought this food processor about five years ago because the owner told me with the high demands I make of my machine, I would burn out the motor of smaller and less expensive machines. It’s a good machine and has served me well, and the juicer attachment makes a project like this very doable.
Ds9 saw what I was doing and asked to help, so I put him to work.
At some point ds5 wanted ds9 to join him in the pool, so he went to swim. We have a gated pool in the backyard for our vacation apartment, and this year I considered having just one pool, to simplify maintenance and cut costs. But I decided against the seemingly more frugal option. Having a second pool on the front patio right outside the kitchen window means I can easily keep an eye on them when cooking and makes it possible for them to spend significantly more time swimming than if I had to leave everything to sit with them in the back. They come home tired and irritable from school, and being able to spend so much time in the pool makes our afternoons much more relaxed and enjoyable for everyone.
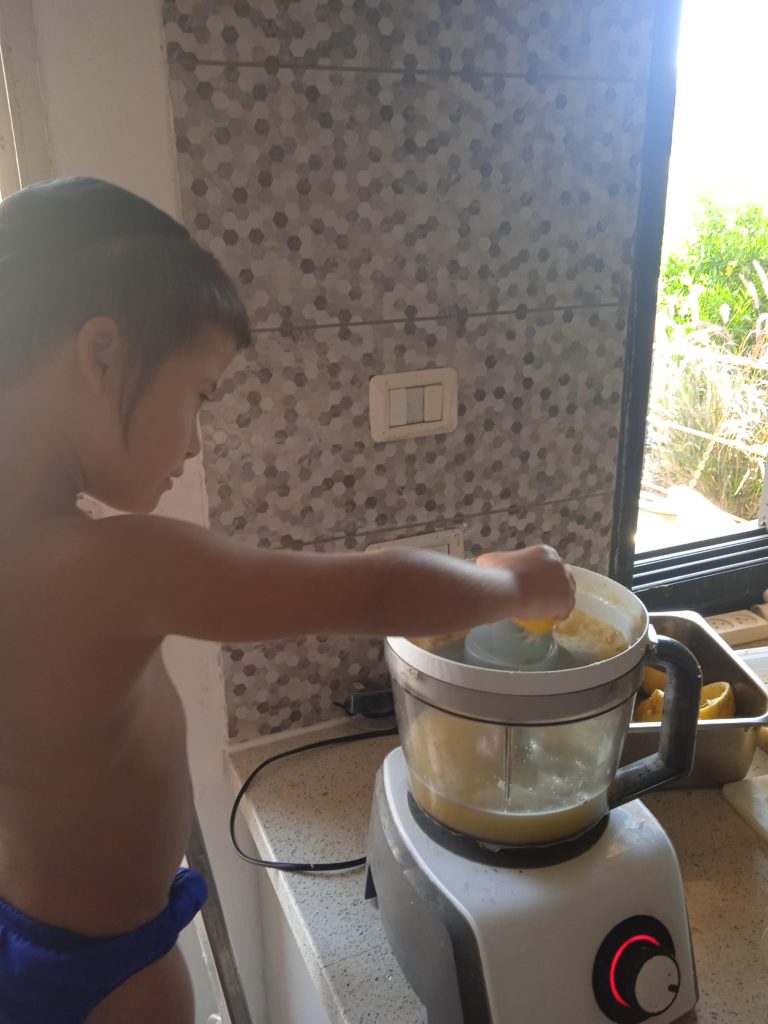
In from swimming and ready to help some more!
Ds9 juicing lemons, with the overflowing pan of juiced lemons and container of leftover pulp in the background.
Ds5 wanted a turn, too!
The inexpensive lemon juice I buy at the store is actually watered down citric acid. This fresh lemon juice is delicious – a bit sweet and very flavorful.
Though the juicer attachment strains out most of the pulp, tiny white seeds still go through. When preserving lemon juice by canning, these little seeds can make the finished result bitter. I learned this with my disappointing experiment canning mandarin oranges earlier this year. They were so sweet and tasty eaten fresh, but once I canned them, they were bitter and unappealing – the pith left on them had caused the flavor to change. I opened all the jars of mandarins, turned them into jam and reprocessed them, but honestly they probably are wasting shelf space because we have yet to touch them.
That experience inspired me to be more careful with the little things that don’t seem so important. We used the pulp that came from our second sieving to make lemonade – with the addition of some water and maple syrup, it made a nice drink for a hot day.
This time, the experiment turned out great! Lemon juiced is a high acidity product, so it can be preserved using the water bath canning method. There are two ways to do it, by pouring the juice into the jars hot or cold. If you choose to do the hot pack method, the jars have to be hot before placing hot juice in them, and you then place the jars directly into boiling water. This can be a time savings because you can boil the water while you’re doing something else, but I prefer the cold pack method because there are fewer steps.
After filling the jars with the unheated strained juice, we placed them into a large stockpot. I have a rack for the bottom of mine, but if you don’t you can put a thin towel or washcloth on the bottom so it doesn’t bang around and crack once the water boils.
Cover the jars with about an inch of water, then put the lid on and bring it to a boil. Once the water is boiling, you begin the processing time – in this case, fifteen minutes for quart sized jars. When the time is up, take the jars out and put them on a towel covering the counter – again, this is to protect the jars from cracking.
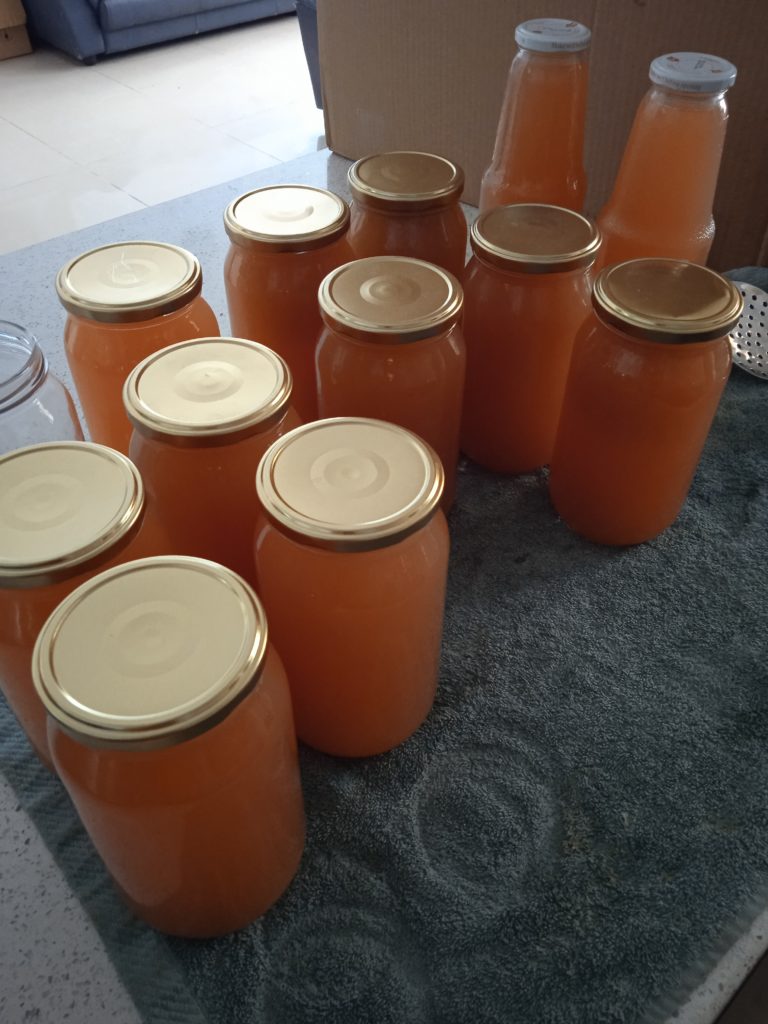
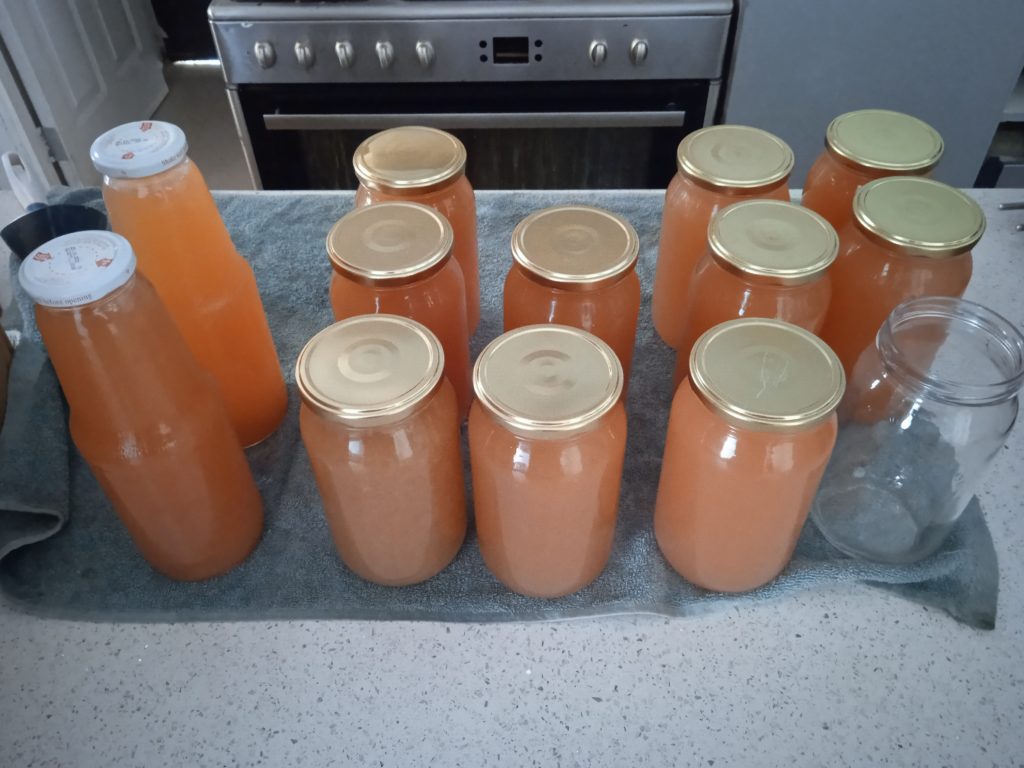
The preserved lemon juice changed color a bit (I’m guessing if I did hot pack that it wouldn’t have changed as much), but the flavor is excellent. As you can see, even after straining it a second time, there was still pulp left that rose to the top once I processed it. I wasn’t worried about straining out all the pulp – if I was, I would have used a finer sieve. I just shake it before using and it’s all good.
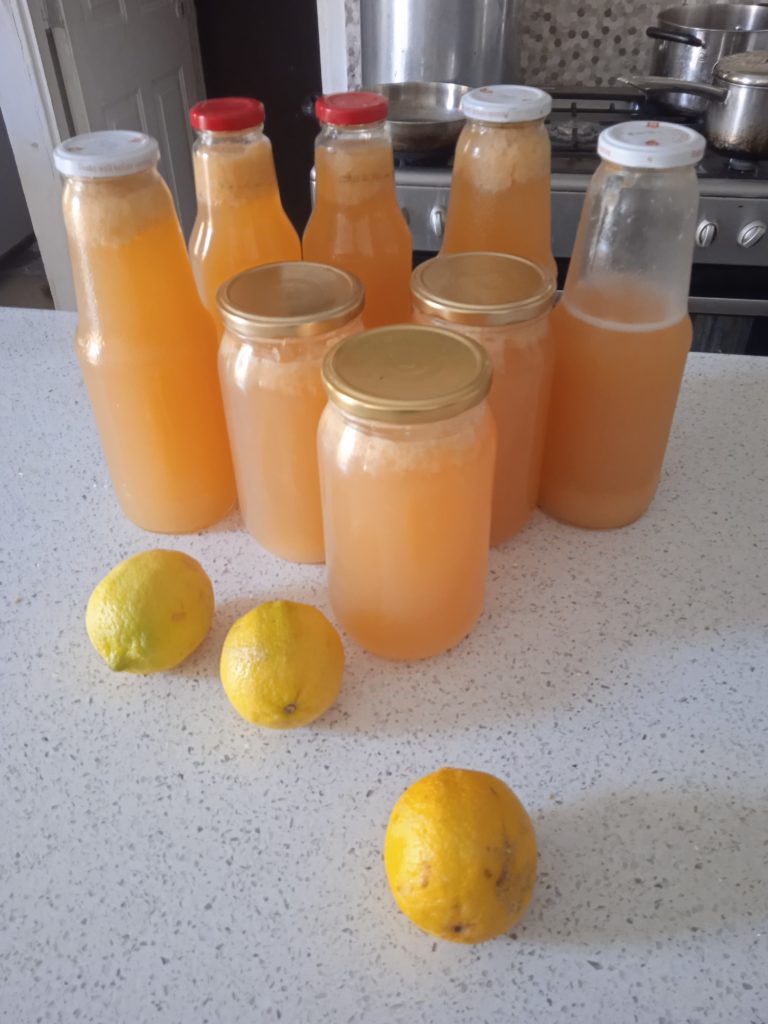
We ended up with a bit over eleven liters of lemon juice.
The finished product, along with the three lemons I left unjuiced so I can use them for salads.
As far as the financial savings – if I compared the cost to eleven liters of the watered down citric acid, making my own saved just 44 shekels. If I compare it to the cost of real lemon juice, it saved much more – over 150 shekels.
That leaves the question, is it worth it to spend the time on this? With my helpers it took about ninety minutes to make the juice. It would have been faster by myself but I consider it a gain when I can double up on the things I want to do and spend time with my children, so I didn’t mind the time spent. I would have had to be available to them during that time in any case.
Now, this equation works because I enjoy activities like this, and I like ending up with a quality product. If I didn’t, this might have felt like drudgery and not worth the time and energy spent.
A few weeks ago there began to be a shortage of formula in the US, a situation that has reached what some officials have called a ‘crisis situation’.
Baby formula is in dramatically short supply, with many stores locking up the formula, limiting it to one per customer, or the stock in the stores simply not there. Parents of babies who need formula are having to drive far distances, pay exorbitant online prices to opportunist sellers – or do without.
As a mother of 11 who has been deeply committed to breastfeeding, I nonetheless have experienced the challenge of not being able to nurse two of my babies. I nursed my tenth child, who had a weak sucking reflex, for four months, while simultaneously pumping for several hours a day to keep my supply up. I finally gave up when despite all my efforts, I couldn’t produce the milk he needed. (I later realized that the two pumps I had borrowed were faulty and that was the source of the problem, but in my exhausted state and with very limited community resources, I couldn’t access other options.)
I turned to formula, trying different kinds while also looking for goats’ milk and mothers’ milk donors, for the most part without success. Finally, after five months we found a formula he could tolerate, that was only available by medical prescription and cost over 1000 shekels a month.
When my eleventh child came into our lives via the legal system, I began seeking out mothers’ milk donors before he even arrived home. I was then living in the center of the country, and access to community resources was dramatically different. Like his brother before him, he couldn’t tolerate regular formula. For the first two years, we were blessed to be able to give him mother’s milk for all but two months (a week here, a week there, when the donor milk couldn’t be found), and for those in-between times we supplemented with a medical prescription formula. I later donated the many unused cans we had purchased to a mother in financial need whose child used that specialty formula. I was so grateful to have the resources that I needed to keep him healthy.
When I think of these desperate mothers seeking food for their babies, it’s heartbreaking. I once ran out of formula due to logistics in prescription/purchasing rules (those have since changed) and we ended up in the emergency room on Shabbos as a result.
These mothers need options. While breastfeeding is wonderful and I fully support it, it’s not an option for everyone. It’s disturbing for me to see commentators – especially men – suggesting that if mothers would be breastfeeding they wouldn’t be in this situation.
Many women physically can’t produce milk no matter how much they try, due to illness or physical challenge on the side of the mother or baby; there are foster/adoptive parents/grandparents raising children that they didn’t give birth to.
I do believe that steps will be taken to to increase formula production and hopefully this will be a short-lived crisis. In the interim, parents need help. If you are a nursing mother and know someone struggling with the formula shortage, perhaps you can offer to help out by pumping. I can’t tell you how grateful I am to the tens of mothers who kept our youngest nourished and healthy thanks to their donations. Or if you see formula in your stores, buy it to donate to someone else who can’t find it. Or share the below information for how to make their own.
How did people feed their infants in the days before commercially produced formula was available? Hiring a wet nurse was a common practice, but in cultures that didn’t have that practice, parents made their own. Here’s are two recipes for formula that are nutritionally complete that were published in Nourishing Traditions; one is dairy and one is meat based. Goat milk is an excellent replacement for mother’s milk, though it needs to be supplemented with vitamin B12 and folate. Many of our elders who were bottle-fed were raised on evaporated milk mixed with Karo syrup; here is a simple emergency formula replacement recipe using evaporated milk, as well as an excellent explanation for why evaporated milk is a better option than regular milk. **Disclaimer: of course every parent needs to verify with their medical professionals that the option they are considering is appropriate for their child.**
Hopefully this situation will quickly be resolved. In the meantime, parents can look to alternative solutions and feel empowered knowing they have the tools to keep their babies fed and happy.
It’s fun when I discover how I can do things on my own that I previously assumed I had to buy or outsource to others, and making my own apple cider vinegar was one of these things!
It is so easy, frugal and healthy, that I can’t believe I didn’t make this until recently.
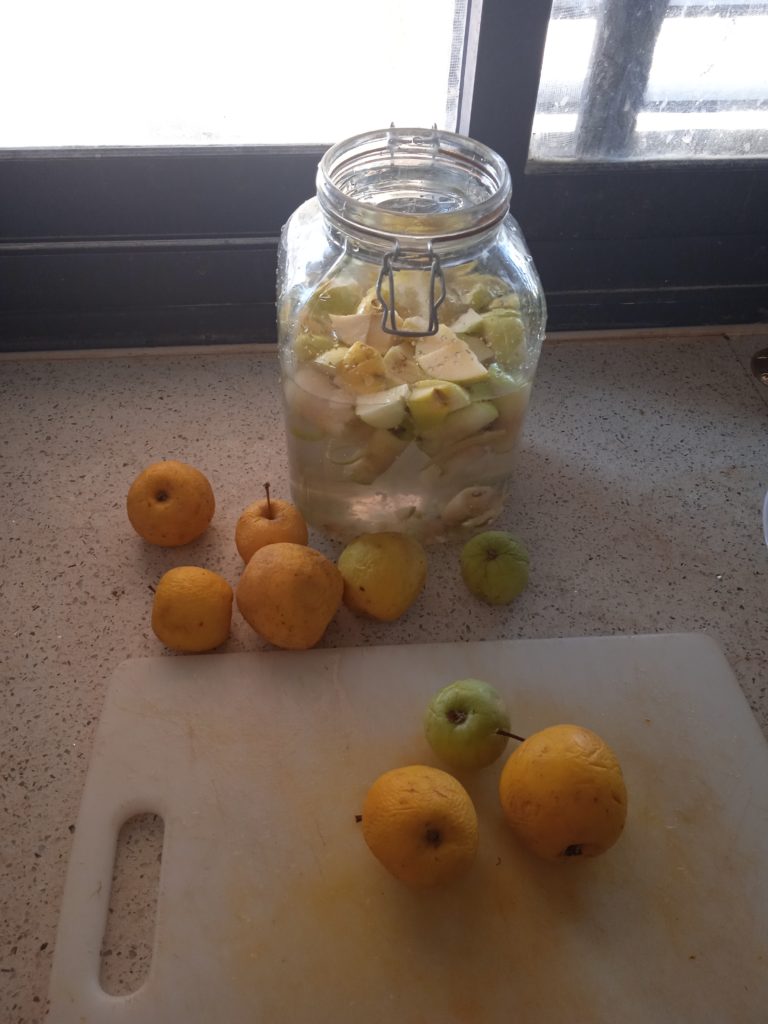
If you’re preparing apples for something else, you can save the peels and cores to use to make the vinegar. Technically this is called scrap apple vinegar. Since I try to minimize waste, making vinegar out of something destined for the trash (or in my case, the chickens) is a bonus. However, in terms of the final result, I made a batch of scrap apple vinegar and a batch of apple cider vinegar, and didn’t notice much of a difference between the two.
1- Fill a jar at least halfway with chopped apples or apple scraps. The flavor and color of the final product will be affected by what apples you use; it’s all good. I had a bunch of yellow apples that started getting wrinkly, so that’s what I used.
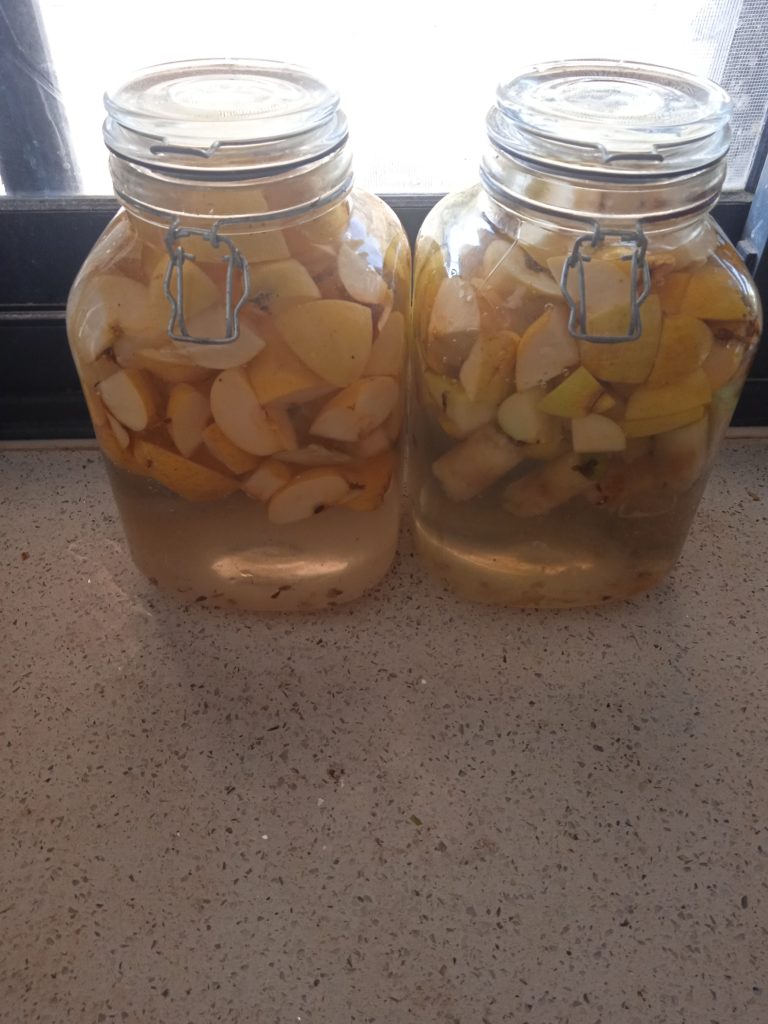
2- Add water to the jar until it’s just about at the top. Technically it’s best to use filtered water but I’ve always made ferments with tap water. The chlorine evaporates when left uncovered or when covered with a cheesecloth.
3 – Add sugar. The official ratio is 1 tablespoon of sugar per cup of water and 1.5 apples. (I’m not so exacting and didn’t find this formula for the ratio until after I had made a few batches, so I can definitively state that it will turn out fine if you use less. I used four teaspoons for each of the large jars you see below.) If you try to avoid eating sugar, don’t worry about it in this case; the fermentation process will eat it up and none will be left in the final product.
4 – Mix, and cover the jar with a cheesecloth to keep anything from getting in. You’ve now just about finished the active part of making apple cider vinegar. Basically you’re going to let it sit on your counter for a few weeks and stir it once daily. (That’s because the pieces will all float to the top, so stirring it will ensure no mold grows on top.)
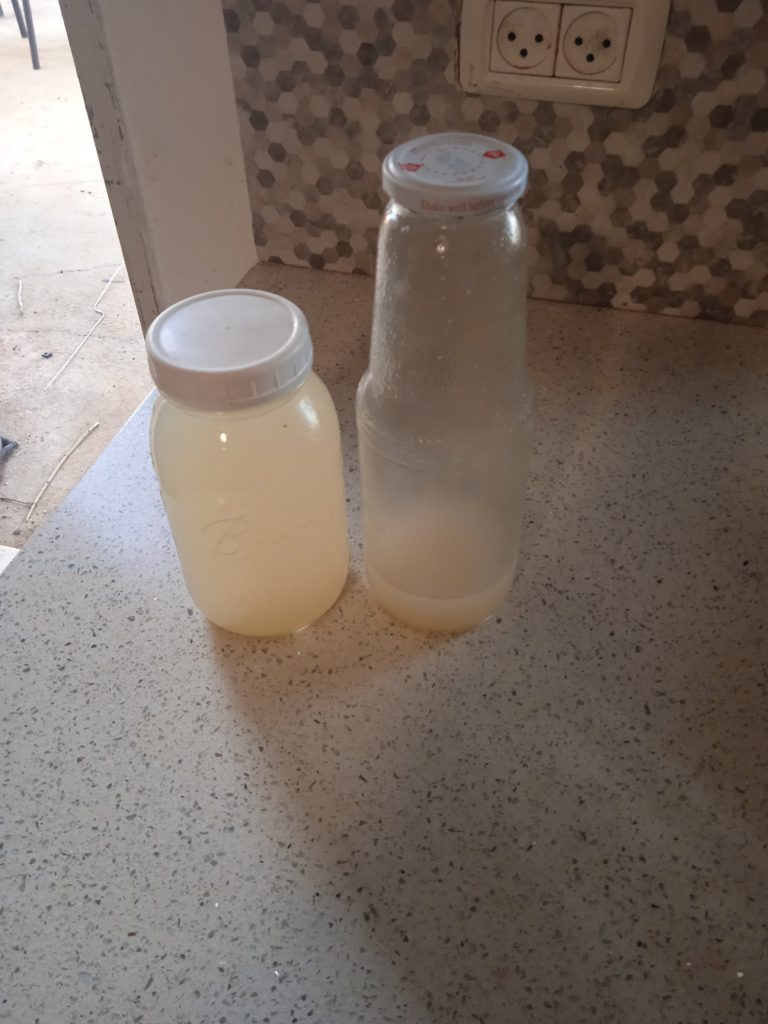
5 – Let it sit a few weeks. Taste it. Do you like how it tastes? Then strain it and bottle it. Not ready yet? Let it sit another week or two. Refrigerate once ready.
That’s it!
I previously mentioned that I really liked the taste of this. My husband tasted my latest batch when it was still sitting on the counter, waiting to be strained, and he likes it, too, so it’s going fast!
There are lots of ways to use apple cider vinegar to benefit your health. Lots of people have written about it, so I’ll just link to one of them and let you read what they’ve written. 🙂 I can add, though, that one of my kids had dandruff, and when they washed their hair using this apple cider vinegar as a rinse just one time, there wasn’t a speck of dandruff remaining and the hair looked so shiny and healthy afterward.
My newest grandson’s bris was a week ago on Thursday, and all of our family members stayed for Shabbos, which was lovely. We held off on my birthday circle for a week to celebrate with more family present. I don’t remember what inspired me to begin the birthday circle tradition and when we started – though I know it’s been at least ten years – but it’s become so rich and meaningful to hear people share what they appreciate about the birthday celebrant, and I personally found it very touching and affirming. (My 28 year old son was amazed at the depth of what his 12 year old brother shared – he said he couldn’t have thought of things like that at such a young age. But then again, he hadn’t grown up listening to birthday circles for years by the time he was 12!)
Sandwiching the enjoyment of time with extended family has been different kitchen projects I’ve been busy with of late.
Making applesauce. Canning applesauce. Using apple scraps to make apple cider vinegar. Canning pomelos. Using the pomelo peels to make a citrus cleanser. Making washing soda. Mixing up a new batch of all purpose cleaning powder (which I’ve been using as a frugal eco alternative to laundry detergent). Making meat broth. Canning meat broth. Canning meat. Canning beans. Canning beef stew. Canning 21 pints of mandarin oranges, then turning them into 7 pints of jam. Making lacto fermented lemons. Harvesting moringa. Drying moringa.
Most of these were new projects to me, and new projects always take more time since I have to learn about it before doing it.
I canned low pressure foods like meat and beans when living in the US but sold my pressure canner when I made aliya over ten years ago. Since the winter I’ve been thinking I really, really want to have a pressure canner again, and been wondering how to get one from the US to Israel (since the shipping and taxes are so high if I have it shipped directly, it would be almost three times the cost of the canner itself!). It finally occurred to me to ask my sister if I ordered one and had it sent to her in the US, would she be able to mail it to me? I am so deeply appreciative for her willingness to help me out, and though I had only asked this favor with the agreement I would pay shipping costs, she refused to let me reimburse her (and shipping was more than the cost of the canner). I can’t tell you how happy I was when it arrived three weeks ago – it’s like having an old friend back in my kitchen with me!
This year I want to spend some time learning more about herbal remedies. I’m heavily reliant on vitamin C, because if you know how to properly dose (most people think that 1000 mg is a normal dose to take when sick and that’s hardly worth anything), it takes care of just about everything. Literally. However, it’s something I order from afar that I can’t manufacture on my own (at least not yet – as I wrote that, it occurred to me that maybe that’s something to research, too!) and with a shaky supply chain it’s foolish for me to rely so heavily on someone else for something critical to my family’s health. While every locale has its own medicinal plants available, learning to use them it requires learning and that takes time!
One beautiful plant I have growing in my garden is ‘sheba’. I didn’t know what it was when I bought it – I thought it was pretty so I planted it. I misspelled it in Hebrew when searching for the English translation, so I didn’t find out what it was for quite some time. I asked others who grew it if they knew what it was, and they told me it was very healthy and useful in multiple ways…but didn’t know the translation. I was excited to finally learn that it’s called wormwood, one of the most powerful anti-fungal herbs in the world. Right in my garden without me realizing it! This morning I was noticing how lush it’s become and it needs to be harvested. That’s now been added to my list of things to learn about. 🙂
On Wednesday evening, my daughter gave birth to a baby boy!
I told my neighbor yesterday, and she looked confused. “I know…you went to Jerusalem for the bris.” No, that was two and a half weeks ago – this is a different daughter!
Who knew when our two daughters got married twelve days apart, that they would later have baby girls 2.5 months apart, and then baby boys 2.5 weeks away?! It’s so special.
Thank G-d, this is our fourth grandson in the last 12.5 months, making for, as my sister said, “A bumper crop of boys!”
This was my daughter’s third birth, but first homebirth. It was so nice to see her an hour later in her own space, looking relaxed and happy. As she said, a homebirth is a completely different experience than a hospital birth.
Now they’re here with us for a few days, and I’m tapping away at the keyboard with this tiny cutie pie on my lap.
One hour old. ————————————–
After dashing out to meet my new grandson, I came directly back home where several women had already arrived for the canning workshop that I was giving that evening. I offered a canning workshop for women in our community several weeks ago, and then did this second one for women who couldn’t make it to the first one.
What I covered was waterbath canning, something that can be done very inexpensively with supplies that are probably already in your home or inexpensively purchased. Canning is a good strategy to make the most of great produce sales, to extend the seasonality of your fruits and vegetables so you can enjoy the when they are no longer in season.
Waterbath canning is good for high acid foods only – that means fruits, fruit juices and pickled items. So while it’s limited, it’s still a great skill to acquire for your frugality and self-sufficiency toolbox.
It took me some time to figure out how to can things here since the jars and lids are different from the US, where most of my canning experience was. I did a bit of canning when I first moved to Israel using recycled jars, then stopped until this summer. What changed things for me was finding where to buy jars very affordably, and how use them. It was a drive to get to the seller but worth it, since just a day after I bought them, someone in my community who does holiday food distribution called to tell me they had given out all the parcels and were left with some produce. Did I want any? Perfect timing!
It’s been fun to get back into canning! There’s a limit to how much fresh fruit you’re going to get, even if it’s free, because there’s a limit to how much you want to eat, and there’s a limit to how long it will stay in your fridge before it goes off. In this case, I got a case each of apples and pears, and with the help of my new jars and large stock pot, preserved them so they are now shelf stable.
————————–
When I went to Jerusalem for the bris a couple of weeks ago, my son-in-law asked me if I wanted zucchini. He knows the quantities of food we go through, and he also knows that I find ways to use whatever comes my way! (Frugality tip – when something is offered and it seems like something that will be helpful, accept it even if you aren’t yet sure what to do with it! You can pass it along to others if you don’t use it.)
At his yeshiva, many families participate in a vegetable buying order; every week each family gets an identical box of assorted produce. They pick up their orders at a central location, and when someone doesn’t want an item that was in their box, they put it to the side. Anyone who comes to pickup his box can add to the extra produce put to the side or take it. On the Friday that we were there, there was a lot of zucchini, and my son-in-law brought me a case and a half!
What to do with so much zucchini? I could have chopped them and frozen them, but am trying to get away from using my freezer so heavily. I don’t like to depend exclusively on something that is dependent on electricity. (I remember well being without power for a week in Baltimore when a storm came through, and trying to cook all the chicken in the freezer before it spoiled, as the daylight faded and I had just a candle for light.) I decided dehydrating the zucchini in the oven would be my best option, but all three batches failed – one spoiled (not hot enough), and two got overdone when the heat was too high. Our chickens enjoyed them, at least.
Since it was clear dehydrating wasn’t working in this case, I thought about what to do with the remaining zucchini. I could can them, but as a low-acid food my only choice was pickling them, and that didn’t sound appealing.
When I began canning in 2008, I made lots of the recipes in the canning books. They looked good and filled the jars, but they weren’t foods that we ate. I learned my lesson – now I won’t can something unless it’s something I know I’ll use.
I started cruising for zucchini inspiration and came across a comment about mock pineapple that got my mental wheels turning – I started thinking about zucchini as a potential palette to absorb other flavors. With some more looking, I found recipes for apple pie and lemon pie filling made from zucchini, as well as pineapple zucchini. It sounds strange, I know. I think of it like tofu. It doesn’t taste like much on it’s own but it can turn into whatever you want.
I made the mock pineapple, and when one of the jars didn’t seal when processing, we put it in the fridge and had some the next day. My boys told me it actually tasted like pineapple and was really good!
———————————
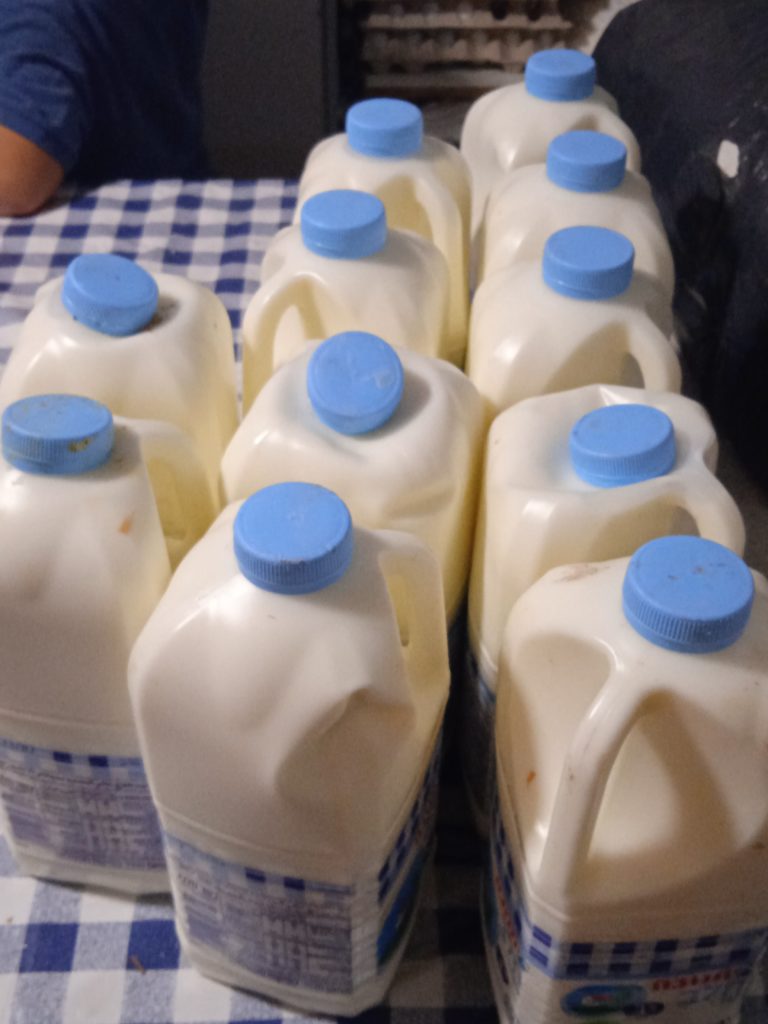
The mock pineapple was especially yummy with homemade yogurt, made by ds14. We got a call a couple of nights ago (from my other son-in-law) that a large synagogue was giving away tons of milk that was due to expire a day later. We got a bunch and while I was out at choir practice, ds14 was busy making loads of yogurt. Literally – he made an 18 liter bucket full! (You can see it behind him in the picture below.)
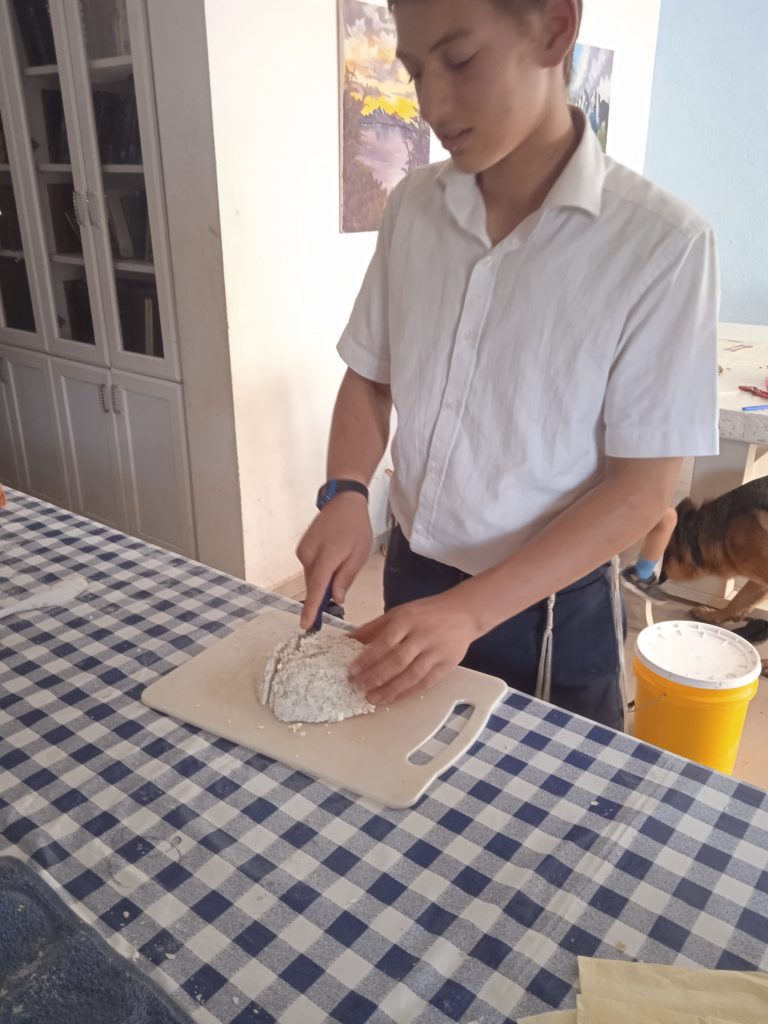
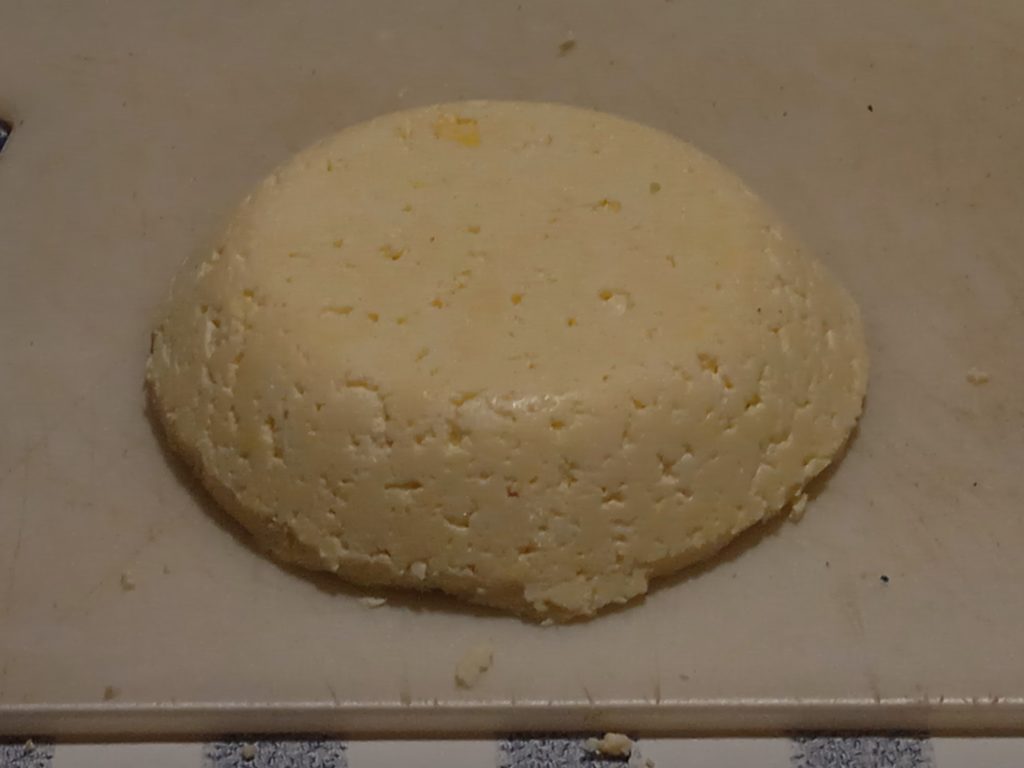
Making cheese
Then over the next couple of days, he and ds12 experimented with making soft cheeses, adding flavorings, straining them, weighting them down. They are using only lemon juice and vinegar for a curdling element, no rennet. My favorite so far was made by ds12, with milk, salt, eggs and yogurt. It takes a lot of milk to make cheese, and it’s fun to experiment when all the milk is free! My boys appreciated the opportunity since they’ve been wanting to experiment with cheese making for quite a while. (A while back ds14 did some cheesemaking, but that ended when the budget I allotted was spent.)
This was my favorite so far, by ds12 – it sliced up really nicely in firm slices. He weighted it down quite a lot to squeeze the liquids out.
The shalom zachor will be at our home tonight, and today will be a busy day getting ready for that as well as Shabbos. Dd21 and ds15 came home last night so they can be here for the shalom zachor (they were initially planning to only next week for the Thursday bris and then stay for Shabbos), and since my birthday is tomorrow I appreciate them being here even more!
I’m fortunate that being in an more agriculturally oriented area, that sometimes I get really good deals on produce. It tends to be feast or famine (like when friends of the farmer picked and shared watermelons left in the field after harvesting with us and many others, and every day for a couple of weeks our boys ate an entire watermelon. Seriously. Every.Single.Day.). It’s not predictable at all. But when it works out, it’s really nice.
Last week I got a great deal on green grapes (free :)). I decided to get more than what I would use for eating during the course of the week, and to experiment with using them for making grape juice.
It’s been a loooong time since I made homemade grape juice. (Nice thing about having a blog is I can check details like this – it’s been twelve years!) And I didn’t know if green grapes would make good juice. But with the price being what it was, it seemed like a worthwhile experiment. 🙂
Ds13 did the first batch, and he did it his way. Though I shared the general instructions with him, he didn’t feel there was any point in heating the grapes before blending them and then straining, so his batch was totally raw. Very fresh tasting. A day later it began to ferment, and then he had fizzy grape juice. I thought that improved the flavor!
But I wanted to do it the traditional way, so I made a batch and then ds12 made the final batch. It was interesting that the color changed when cooked. The raw juice was the color of the green grapes, but the cooked juice had a pinkish hue.
Here’s how complicated making grape juice is: 1) destem the grapes (that’s the most time consuming part). 2) Put them in a pot with some water (I didn’t add too much, but if you wanted it to be less concentrated or added sugar, you could add significantly more water), and sugar if you desire (we didn’t desire :)). 3) Let boil and then continue simmering on low for about fifteen minutes. 4) Mash the grape mixture with a potato masher to release the flavors. (You can also use a food processor but this was easier.) 5) Strain. Voila!
It’s fun to make something that you’re used to thinking of as an item you need to buy at the store.
I don’t have a lot of freezer space for a bunch of bottles, and I had just bought some glass jars the day before, so we decided to preserve the juice so that it would be shelf stable.
I haven’t canned in AGES. I used a couple of recycled juice jars, and all the rest were standard glass jars with pop-top vacuum lids. (These lids vacuum seal when water bathed.) Since I could only fit six jars in the pot and I wanted to go rest, I asked ds13 to finish canning the last jars.
When I woke up, he had cleaned up the kitchen for Shabbos, the jars were not only taken out but had cooled and put on the pantry shelf. He was so excited to show me! It really is gratifying to do something like this; I know that very pleasant productive feeling.
From our free grapes, we made 13.5 liters of sugar-free, all natural grape juice (there are four cups to a liter). We canned 11.5 liters; the two liters of raw juice we didn’t heat process and enjoyed as is. We opened the first bottle that evening for Shabbos kiddush, and all agreed that it was very tasty. We should have enough to get us through the holidays, when we can share it with visiting family!
Yesterday someone dropped by and brought along a couple of small baskets of mushrooms. He said they were being given away, and because the location they were given out was outdoors, they were going to spoil quickly.
I headed over and got lots of mushrooms in perfect condition, and decided to maximize the bounty by dehydrating them to use at a later time. However, a piece on my dehydrator burnt out a few months ago, so it’s now a bulky plastic box that isn’t of much use. I had been thinking of building a screen covered kind of box about the size of the dehydrator, that I could slide the dehydrator trays into and use outside. But that hasn’t happened so I had to improvise if I wanted to take advantage of this opportunity!
In any case, I live in a hot, dry climate, so doesn’t it seem like a waste to use a machine to mimic what nature is doing all day long for free?
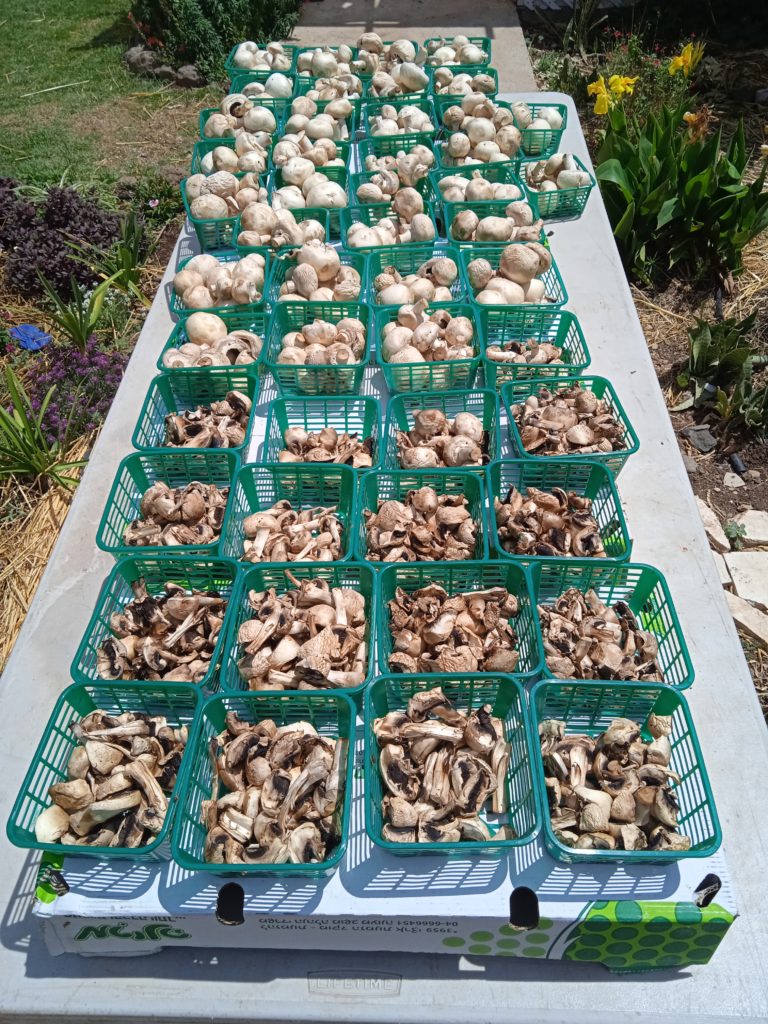
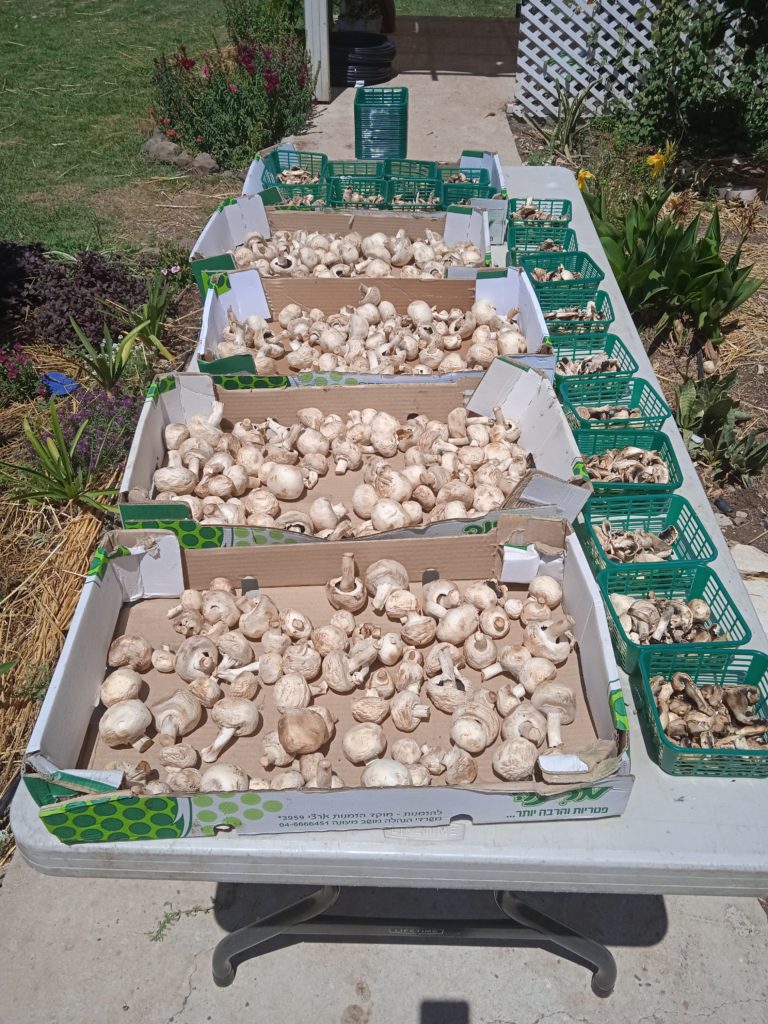
I sliced up several of the baskets of mushrooms, then put them back in the baskets and set them out in the sun. Meanwhile, I thought about how to dry the rest of them. Maybe, I mused, I could thread the whole mushrooms with fine fishing line and string them up in the sun.
This morning I thought of an obvious solution. I set up a folding table in the sun, then put the cartons the baskets of mushrooms came in, upside down on top of the table. Then I put the mushrooms on top of the cartons (so there would be air flow underneath) in the original baskets they came in.
Dehydrating mushrooms
You can see the sliced mushrooms in the front are dehydrating very nicely (they had a head start over the whole mushrooms). I went out after a few hours to check on them, and realized if I put the cartons right side up and put all the whole mushrooms inside, they would dry even more quickly and it would eliminate the need to rotate them. This was a good option once they were dry to the touch.
I’m very optimistic about this! If this works well, it was quick and easy to set up and because it’s so hot, there’s not a single fly or insect anywhere near them! (I will cover them with a screen if I see any flies.) I’m hoping they’ll all being completely dried by the time the sun goes down tonight, and also hoping to experiment further with solar dehydration over the summer.
Edited to add: the sliced mushrooms were finished in a day; the whole mushrooms were almost finished in two days but I put them out for one more day to make sure there wasn’t any moisture that could lead to molding once I stored them. Here’s what it all looked like once it was done:
The sliced mushrooms are in the container on the front right; the other two containers are filled with whole dried mushrooms, which can be used whole or cut up when cooking. As you can see, they shrink down quite a bit and don’t take much space to store.
I did keep one case of mushrooms to use fresh for Shabbos! The last time I made marinated mushrooms they were a big hit.
This summer, I saw a used freezer listed for sale. It was priced too high, and when I went to take a look at it saw that it wasn’t cosmetically the best. A shelf was missing from the main freezer, a shelf support was missing on the door, and someone had tried to repaint over the very bottom. And the owner was only willing to go down a hundred shekels on the price.
When I buy used, I like to buy things that are in excellent condition – it doesn’t have to look brand new but I want it to look really good. And I like to buy things that are a good deal. Nothing about this freezer was a match for me.
Except for one important feature… and I bought this beat up old freezer! Why in the world did I do that?
With my oldest daughters married and my older teenagers all not available, I was feeling maxxed out and realized I needed some kind of help. The younger boys were a big help but I didn’t want to ask too much of them, and I couldn’t keep doing everything else myself – the shopping, the cooking, the laundry, the cleaning, the million and one other things that go with being a parent and keeping a house running. And homeschool. And spend relaxed time with my children. And give parenting classes. And see clients privately.
Too much.
Either I was going to have to pay someone to cook or clean for me (which in 26 years I had never done), or I was going to have to find some other kind of help.
This was my solution. This 14 year old massive American freezer that wouldn’t win any contests for looks.
The winning feature? Its size.
They don’t make freezers this big here; this was brought over on a lift when someone moved here. I knew the additional space would allow me to cut down on how often I shopped and maximize good deals when I found them. I’d be able to cook in advance and save time on busy evenings. That would mean fewer things taking up my time and energy.
I paid 600 shekels and while it wasn’t technically worth more than 500 max, it was worth every shekel to me!
I’ve already saved tons of money by stocking up on chicken when the prices are low. And I’ve saved travel time and shopping time and gas costs in being able to shop less often. But more than the money savings – and that’s a significant reason to have a freezer – this has made my life so much easier!
It’s kind of like having a personal assistant. Kind of. Because while I still have to do the work, I can maximize my efforts by preparing two times the recipe, serving one and freezing one for a different night.
I can’t tell you how much I love this!
Here’s the picture tour. 🙂
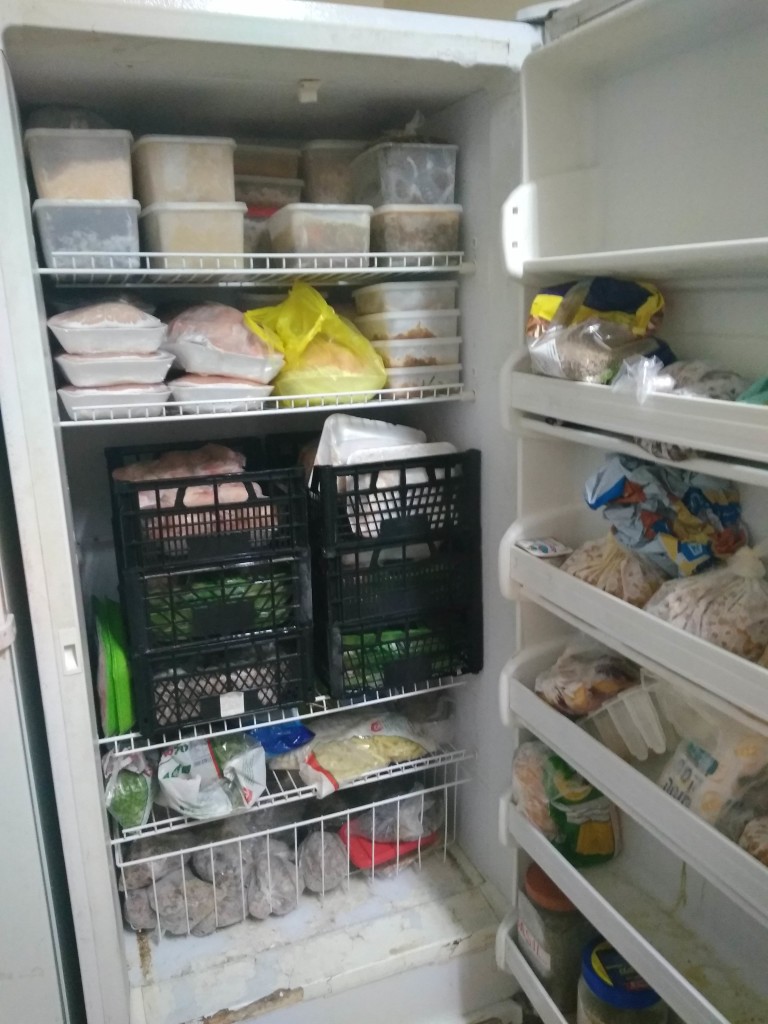
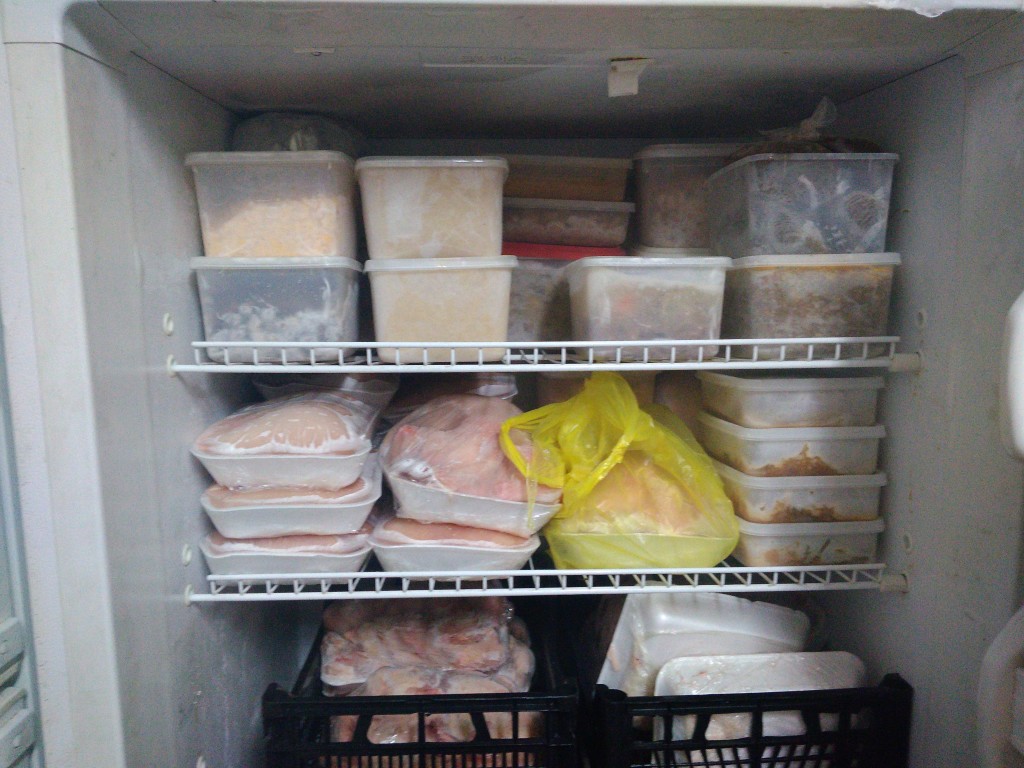
Top shelf: frozen meals (each labeled on top – the labels on the side tend to fall off).
Second shelf down: on the left, frozen chicken breasts and whole chicken. Bought on sale, of course. About 25 kg at this moment.
On the right side are lunches for my husband to take to work – he takes one out every evening before going to bed and it’s defrosted when he leaves early in the morning.
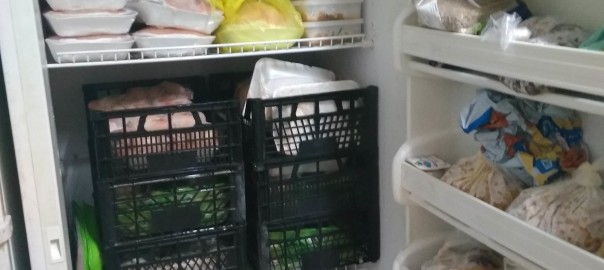
Here’s my solution to the missing shelf. I didn’t want to waste all that space and it was way too high a space to stack things.
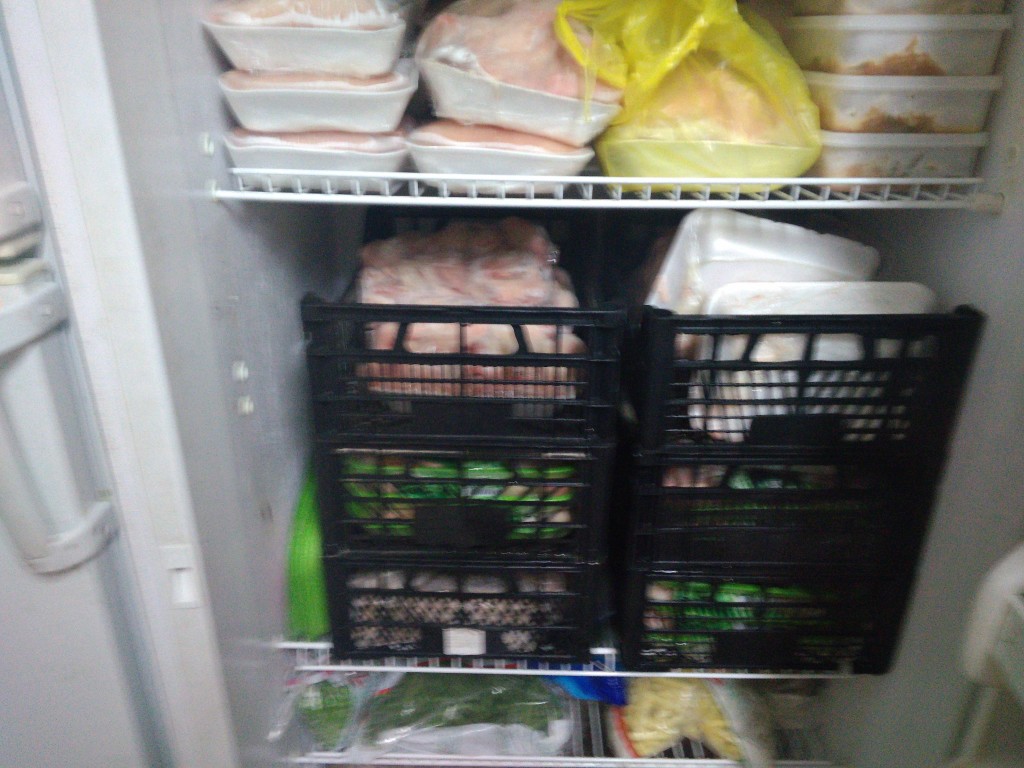
I got these stackable plastic crates for free from two different supermarkets – crates of vegetables are packed in these and then thrown away. It would be nice if they fit perfectly and used every bit of space but it’s pretty darn good! This is all chicken wings; I bought 30 kg when they were on sale for 4.90 a couple of weeks ago.
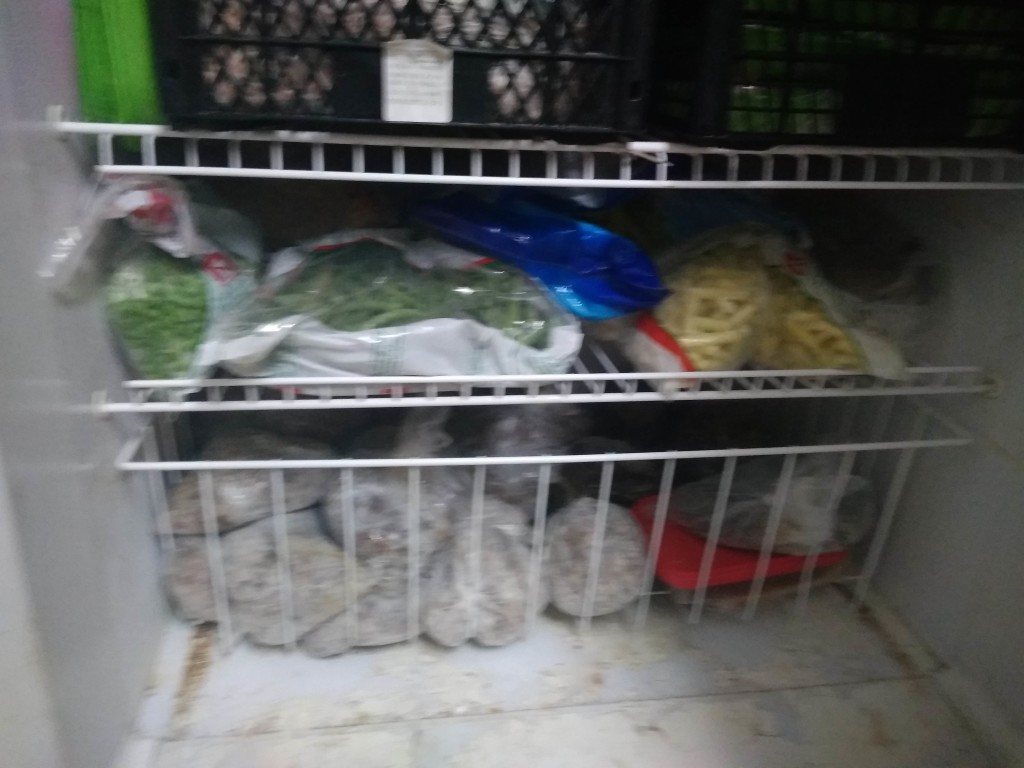
On the shelf under the chicken wings are frozen vegetables and fish.
The bottom is a pull out drawer and it filled with bags of cooked and shredded or sliced chicken gizzards to the left, and bags of frozen mashed bananas on the right.
(And on the very bottom you see the scuffy paint job. At some point when it’s empty, I’m going to clean it all out, scrape out the old paint and silicone it. I think that would look much better. But even though it’s ugly it’s still very usable so there’s no urgency to do this any time soon.)
In the door I have bags of cooked beans and other odds and ends. I have a couple of ideas of how to build a substitute door support for the top door shelf, but I haven’t needed the space yet so again, not pressing.
And now that I’ve reworked the space in our new kitchen area, we have room for a fridge and the freezer side by side, so it’s super convenient and easy to access.
I’m telling you, the simple things in life can make such a huge difference!