Category Archives: cheesemaking

Another new grandson, canning activities, making cheese

On Wednesday evening, my daughter gave birth to a baby boy!

I told my neighbor yesterday, and she looked confused. “I know…you went to Jerusalem for the bris.” No, that was two and a half weeks ago – this is a different daughter!

Who knew when our two daughters got married twelve days apart, that they would later have baby girls 2.5 months apart, and then baby boys 2.5 weeks away?! It’s so special.

Thank G-d, this is our fourth grandson in the last 12.5 months, making for, as my sister said, “A bumper crop of boys!”

This was my daughter’s third birth, but first homebirth. It was so nice to see her an hour later in her own space, looking relaxed and happy. As she said, a homebirth is a completely different experience than a hospital birth.

Now they’re here with us for a few days, and I’m tapping away at the keyboard with this tiny cutie pie on my lap.

One hour old.
————————————–

After dashing out to meet my new grandson, I came directly back home where several women had already arrived for the canning workshop that I was giving that evening. I offered a canning workshop for women in our community several weeks ago, and then did this second one for women who couldn’t make it to the first one.

What I covered was waterbath canning, something that can be done very inexpensively with supplies that are probably already in your home or inexpensively purchased. Canning is a good strategy to make the most of great produce sales, to extend the seasonality of your fruits and vegetables so you can enjoy the when they are no longer in season.

Waterbath canning is good for high acid foods only – that means fruits, fruit juices and pickled items. So while it’s limited, it’s still a great skill to acquire for your frugality and self-sufficiency toolbox.

It took me some time to figure out how to can things here since the jars and lids are different from the US, where most of my canning experience was. I did a bit of canning when I first moved to Israel using recycled jars, then stopped until this summer. What changed things for me was finding where to buy jars very affordably, and how use them. It was a drive to get to the seller but worth it, since just a day after I bought them, someone in my community who does holiday food distribution called to tell me they had given out all the parcels and were left with some produce. Did I want any? Perfect timing!

It’s been fun to get back into canning! There’s a limit to how much fresh fruit you’re going to get, even if it’s free, because there’s a limit to how much you want to eat, and there’s a limit to how long it will stay in your fridge before it goes off. In this case, I got a case each of apples and pears, and with the help of my new jars and large stock pot, preserved them so they are now shelf stable.

————————–

When I went to Jerusalem for the bris a couple of weeks ago, my son-in-law asked me if I wanted zucchini. He knows the quantities of food we go through, and he also knows that I find ways to use whatever comes my way! (Frugality tip – when something is offered and it seems like something that will be helpful, accept it even if you aren’t yet sure what to do with it! You can pass it along to others if you don’t use it.)

At his yeshiva, many families participate in a vegetable buying order; every week each family gets an identical box of assorted produce. They pick up their orders at a central location, and when someone doesn’t want an item that was in their box, they put it to the side. Anyone who comes to pickup his box can add to the extra produce put to the side or take it. On the Friday that we were there, there was a lot of zucchini, and my son-in-law brought me a case and a half!

What to do with so much zucchini? I could have chopped them and frozen them, but am trying to get away from using my freezer so heavily. I don’t like to depend exclusively on something that is dependent on electricity. (I remember well being without power for a week in Baltimore when a storm came through, and trying to cook all the chicken in the freezer before it spoiled, as the daylight faded and I had just a candle for light.) I decided dehydrating the zucchini in the oven would be my best option, but all three batches failed – one spoiled (not hot enough), and two got overdone when the heat was too high. Our chickens enjoyed them, at least.

Since it was clear dehydrating wasn’t working in this case, I thought about what to do with the remaining zucchini. I could can them, but as a low-acid food my only choice was pickling them, and that didn’t sound appealing.

When I began canning in 2008, I made lots of the recipes in the canning books. They looked good and filled the jars, but they weren’t foods that we ate. I learned my lesson – now I won’t can something unless it’s something I know I’ll use.

I started cruising for zucchini inspiration and came across a comment about mock pineapple that got my mental wheels turning – I started thinking about zucchini as a potential palette to absorb other flavors. With some more looking, I found recipes for apple pie and lemon pie filling made from zucchini, as well as pineapple zucchini. It sounds strange, I know. I think of it like tofu. It doesn’t taste like much on it’s own but it can turn into whatever you want.

I made the mock pineapple, and when one of the jars didn’t seal when processing, we put it in the fridge and had some the next day. My boys told me it actually tasted like pineapple and was really good!

———————————
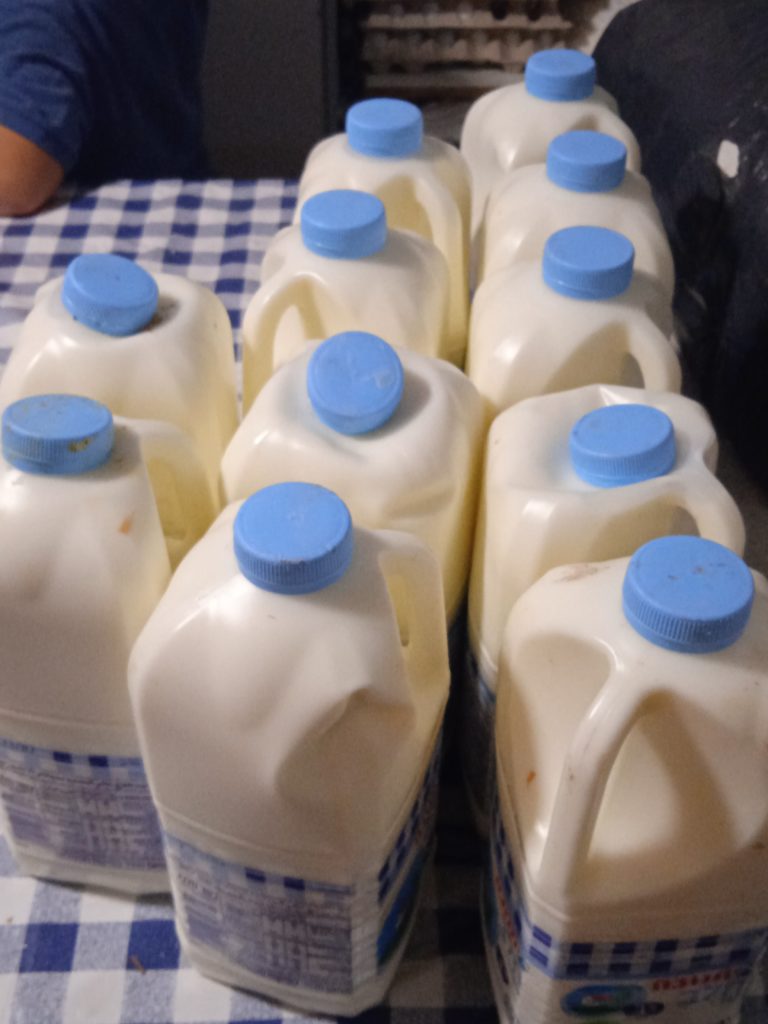
The mock pineapple was especially yummy with homemade yogurt, made by ds14. We got a call a couple of nights ago (from my other son-in-law) that a large synagogue was giving away tons of milk that was due to expire a day later. We got a bunch and while I was out at choir practice, ds14 was busy making loads of yogurt. Literally – he made an 18 liter bucket full! (You can see it behind him in the picture below.)
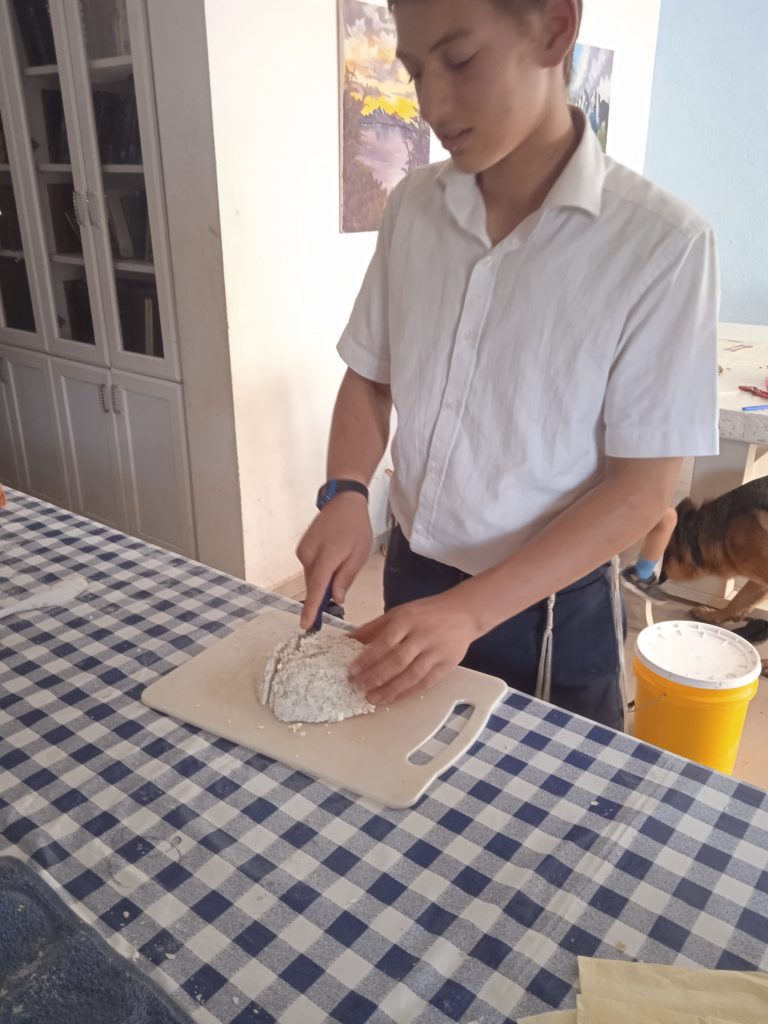
Making cheese

Then over the next couple of days, he and ds12 experimented with making soft cheeses, adding flavorings, straining them, weighting them down. They are using only lemon juice and vinegar for a curdling element, no rennet. My favorite so far was made by ds12, with milk, salt, eggs and yogurt. It takes a lot of milk to make cheese, and it’s fun to experiment when all the milk is free! My boys appreciated the opportunity since they’ve been wanting to experiment with cheese making for quite a while. (A while back ds14 did some cheesemaking, but that ended when the budget I allotted was spent.)
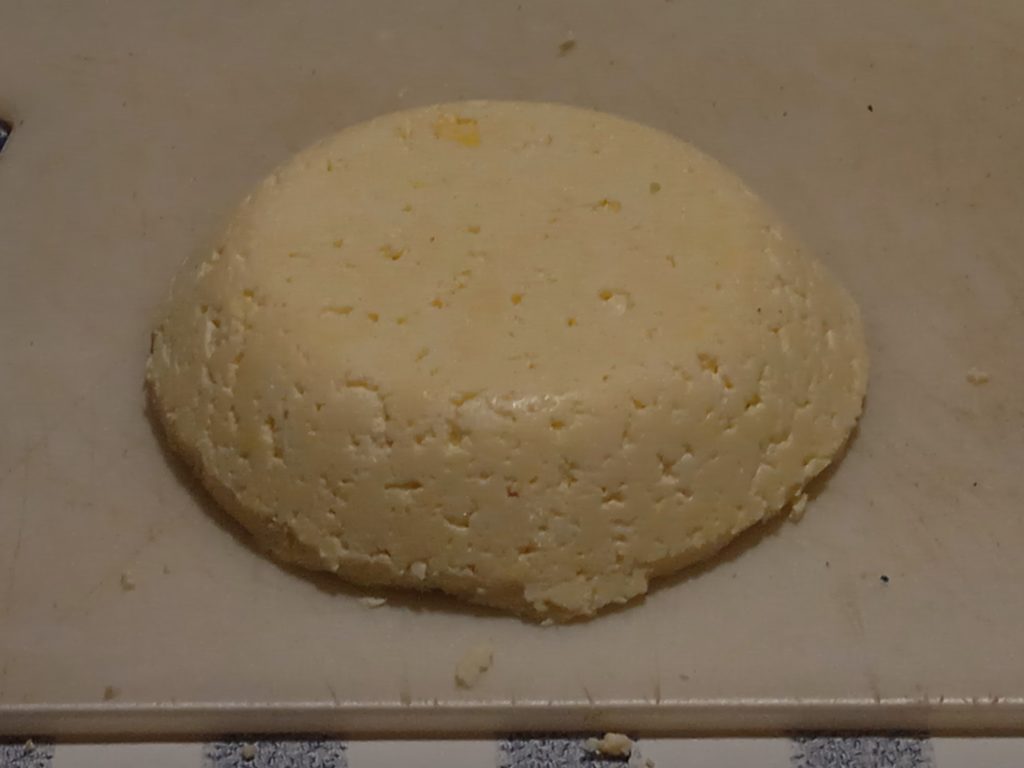
This was my favorite so far, by ds12 – it sliced up really nicely in firm slices. He weighted it down quite a lot to squeeze the liquids out.

The shalom zachor will be at our home tonight, and today will be a busy day getting ready for that as well as Shabbos. Dd21 and ds15 came home last night so they can be here for the shalom zachor (they were initially planning to only next week for the Thursday bris and then stay for Shabbos), and since my birthday is tomorrow I appreciate them being here even more!

Avivah

How to make yogurt

Yesterday I made a large batch of yogurt, something I haven’t done in a while. I had forgotten how extremely easy it is to make, and it’s about a third of the price of the least expensive store yogurt!  I made a very large recipe of 1.5 gallons (24 cups), but the recipe below is for a more moderate amount.

Homemade Yogurt

  • 2 c. milk
  • 2 T. yogurt to use as bacterial starter (look for any plain yogurt at the store that says it has bacteria in it – eg. acidophilus- you can get the smallest cup size sold)

I used organic whole milk, but you can use any kind of milk you want.  Put the milk in a pot, and heat it until almost boiling, 180 degrees.  I have a candy thermometer for this, which eliminates the guesswork.  Once it reaches that heat, turn off the heat and let it cool down to between 105 and 110 degrees.

Stir in the yogurt.  Don’t let the temperature go below 105 degrees before you pour into a jar, then cover the jar with a lid.  Now put the jar somewhere warm where it can incubate overnight.  An oven set to 100 degrees is perfect, but you can also put the jar into a picnic cooler.  If you’re using a cooler, line it with a towel, put the jar in, and cover it with a towel.  Some people put a heating pad set on low on top of the towel, or a hot water bottle, to keep the temperature constant, but if you make several jars of yogurt, then the heat from the jars will keep all of them warm without anything extra.  It should be ready within eight to twelve hours.

I did a couple of things that made the process even easier.  First of all, I left the yogurt to incubate in the covered pot I heated it in.  Then I removed the trays from my dehydrator and put the entire pot inside (set at 100 degrees).  And that was all we had to do, except eat large quantities of it for breakfast. 🙂

You can add flavorings if you like. This morning I had mine with some fruit spread that I canned a while back, and it reminded me of a healthy version of the yogurt cups with fruit at the bottom when mixed together.

Avivah

Making kefir

I love making kefir!  I didn’t make it very often or very regularly this winter, but now I’m back into it being a regular part of my daily routine so I thought I’d share about it with you.

Kefir is cultured milk, packed full of fantastic probiotics.  You can buy ready made kefir in stores for an outrageous price (and you know I won’t advocate this!), or you can make your own.  If you decide to make your own, you have a choice of using a powdered starter or kefir grains.  The powdered starter needs to be purchased periodically, whereas the kefir grains can last forever (unless you are like me and don’t treat them well, or one of your family members throws them away :)).  The cost for kefir grains can therefore be a one time expense.  If you’re lucky enough to get some from someone who has extra, they can be free or a very low expense.

I’ve been able to get kefir grains from an individual, though I’ve damaged their ability to propagate (kefir grains grow).  But they still work just fine, and yesterday I was amazed to see just how effective the grains I have are.  I only have about a teaspoon of grains (grains look like a clunk of pinkish cauliflower).  Anyway, until now I’ve always made kefir in a quart jar, but a quart is such a tiny sized amount for our family that I had to ration out servings to be sure everyone would get some.  However, we recently finished a gallon sized glass jar of olives, and after cleaning it, removing the label, soaking it with baking soda to remove any odor, and toiveling it, it was ready to be used as my new family sized kefir jar. 

To make kefir, all you have to do is put the kefir grains in a glass jar, add milk, and leave it at room temperature until it cultures.  It’s misleading to say you’re making kefir, since it practically makes itself.  In warm weather it cultures very quickly; in cold weather it takes longer.  I put my grains in our new large jar, and was curious how long it would take to culture a gallon of milk, since it was such a small amount of grains.  I started it in the afternoon, and by breakfast the next morning (ie less than 16 hours), the entire jar was ready.   I was delighted, and so were my kids, since now I can be more generous with how much I give them. 

If you want to know more about kefir, you can check out the following site: http://users.sa.chariot.net.au/~dna/kefirpage.html.  If you read even a small part of it, you’ll know more than most people do about kefir.  I’d encourage everyone to aquire some grains and make some kefir for yourself and your family – it’s very inexpensive (basically just the cost of the milk, once you have the grains), and it’s a wonderful health supplement that strengthens your digestive health.  One thing I like about kefir grains is that you can transform the nutritive value of regular store milk by culturing it.  I used to only use raw milk for everything, but then I’d run out before my next shopping trip.  Now I mostly use the raw milk for drinking and pasteurized milk for culturing – it would be better if I could use all raw for everything, but I simply don’t have enough room in my freezer to buy the amount I need to last from one shopping trip to the next (unless I drastically cut down on the amount of milk we use). 

As far as taste, it’s kind of like a sour liquidy yogurt.  Lots of people like to blend it up with fruit or something else for a breakfast smoothie, but we like it just fine on its own.  If I were making a smoothie, I’d add coconut oil, fruit, and spirulina powder for a nutritionally charged breakfast. 

When the milk cultures, if you let it sit long enough it will separate, with the curds rising to the top and the whey remaining at the bottom of the jar.  I stir it together before drinking it, but you can also take out the thick and creamy curds at the top to eat, and put aside the whey to use as an acidic medium to soak your grains in.  There are other uses for whey, but I can’t think offhand of what they are since I don’t do anything else with it. 🙂

If you use only chalav yisroel, then you’ll have to take some extra steps to be able to use milk grains.  A friend I have who checked out with her rav how to handle it told me the following: you have to make and discard three batches of kefir from the grains before you can drink the kefir – ie, the fourth batch is okay.  But ask your rav for guidance; I’m just passing on what she told me. 

In our home, the kefir jar is now back in its regular place as a countertop ornament. 🙂

Avivah

Made mozzarella today!

This morning my 13 year old daughter made cheese for science.  :))  Gotta love the fun and flexibility of homeschooling!

She actually tried to make it yesterday afternoon, but I didn’t yet  have citric acid, and I told her to use lemon juice instead.  Generally the principle I follow is to make something the first time the way the recipe is written and only adapt after that.  I should have stuck to that yesterday, because the cheese never curdled.  LOL – it was a good way to learn that there’s a reason for each ingredient in cheese making.

But no harm done, because she used the same milk this morning for another try at mozzarella, and this time was immediately successful!  All of the other kids were crowding around to watch her (it’s good the baby and toddler were napping or she’d never have been able to move), and I told the other kids that anyone else who wants to make cheese can have their own turn to make a batch, too.  She even braided it – it looked really nice.  We had fresh cheese for lunch immediately when she finished – there was no way kids were going to wait after watching and salivating over it.  🙂 

Then she used the whey to make mysost, a Scandinavian whey cheese.  This turned out well in all regards but one – it was much too salty.  That was because she had added extra salt to the whey when she was dipping the mozzarella cheese in it, because she wanted it to have it be more flavorful than it was initially.  And when the salted whey was boiled down to make the mysost, the saltiness became too intense. 

But as I always tell my kids, making mistakes is part of learning, so now we’ve learned not to add more salt to the whey if we want to use it for something else afterwards.  Even if we hadn’t wanted to make whey cheese, we would have kept it to use as an acidic medium for soaking oats (to break down the phytic acid), so I still wouldn’t want it to be salty.

By the way, the recipes we’re using are from a book called Home Cheese Making, by Ricki Carroll – there are 75 recipes of all sorts and we’re planning to just follow the recipes.  We were able to borrow it from the library, so I suggest you check there before rushing to buy any books if you’re interested in learning about cheese making. 

Avivah

Watching the rennet disappear!

Here’s the amazing story of how my fifteen available bottles of rennet are getting quickly snapped up since just yesterday. 

So you already know that I bought that big bottle of rennet, and my hope was to recoup my costs by selling small bottles to fifteen other families.  When I initially placed my rennet order, I was really hoping that I wouldn’t be forced to take a big loss on it.  Yes, I wanted to make cheese, but if I end up in a year having to throw away 15/16s of a container because I couldn’t use it (the rennet is perishable), then that’s not only wasteful, but very expensive cheese!

Anyway, I posted on a parenting list I’m on about it, and three people said they were interested, which was a good start, since that was four or five bottles between them all.  But it still left eleven bottles.  Today I called a couple of women locally who I thought would be interested (we’ve discussed raw milk and gardening in the past), and they both wanted a bottle.  Not only that – here’s the amazing thing: one of the women is hosting a cheese making workshop in her home this Sunday, and has spent the last few weeks researching all of the things I told you about in my last post.  She’s not giving the class, but is the one organizing it all, and is the one responsible to get hold of kosher cheese making supplies for this workshop.  She has literally been one step behind me all this time (she called the OU less than three hours after I called, and the rabbi asked her, “Didn’t I just speak to you about a little while ago?”  LOL – I’m not surprised he thought it was me again, since it sounded like he had never been asked about the products I was asking him about).

 So she’s buying some for herself, and told me that probably the other 4 or 5 women who keep kosher who are attending might be interested in getting some, too, and offered to make them available at her workshop and collect money.  I’m so amazed by how G-d makes everything happening  – the timing is so incredible!   Right now I have 8 or 9 bottles spoken for, and am hopeful that Sunday the rest of the bottles will be sold.  When that happens, all of my costs will be recouped (it’s not a moneymaking venture – I’m selling them at what it cost me), all within a few days of first making the rennet available!  Isn’t G-d’s timing amazing?

Avivah

Kosher cheesemaking supplies

I’ve spent quite a bit of time researching what is needed for cheesemaking, as well as where to buy the supplies for kosher cheesemaking, which is a lot more involved.  So I thought I’d share it with you since if any of you are interested, it will save you hours of research.  🙂

Firstly, you need rennet.  Most rennet are made from animal sources, but there are vegetarian sources of rennet.  However, almost none of these are kosher.  I finally found one source of certified kosher liquid rennet, Chr. Hansen in WI, but they sell only to large companies.  The company I found that sells this particular rennet, Chymax Extra, was Kelley Supply.  However, Kelley Supply only sells in industrial sizes, and though I found a company that buys large containers of this rennet from Kelley and repackages it for their customers, there’s no kosher supervision on the small containers that they send out.  I called that company (New England Cheesemaking Supply) to speak to them in detail about their repackaging process, hoping that there would be some way we could use the repackaged smaller container of rennet.  No luck – rennet has the status in kosher laws of not being nullified to the sixtieth (botel b’shishim), and because they also repackage animal rennets there, there’s no way to know that you’re getting something untainted.  The only remaining solution that I could see was to order the smallest industrial container size available (enough for over 1000 gallons of milk), and hope that I could afterwards find others to buy some of the rennet from me.

The next thing is bacterial starters, mesophilic and thermophilic.  I was really hoping this wouldn’t need kosher certification because I was already tired of the researching process, but no luck – it definitely does.  After calling the OU to speak to them, I was given the source of the only OU certified starter products in the US – DSM Food Specialties.  I wasn’t having fun trying to get hold of them – they are an extremely huge company, and as I called back for the I don’t know how many-eth time trying to get someone to speak to, I said to my kids, “This is why no one makes kosher cheese on their own; it’s just too hard to get the kashrus information and supplies.”  BUT -I did more research, and found a source of OU certified bacterial starters, and the owner, Cathy Potter, with whom I spoke, was an absolute pleasure to deal with.  http://www.dairyconnection.com/cultures.htm  Not all of their starters are kosher, just those in the MM and MA line, marked EZAL – these come in packages each marked with OU certification.

I wanted to order both thermophilic and mesophilic starters, since different recipes call for different ingredients.  I wouldn’t have known that there are two different thermophilic starters, from the TA and LH series, or what the purpose of them was.  Fortunately Cathy isn’t a sales representative impatiently waiting for you to quickly tell them your order so they can get off the phone, and when she asked what kind of cheeses I wanted to make, she pointed me in the right direction and gave me helpful information.  I ordered one of each – when making Italian cheeses, you use a mixture of both, in a ratio of 2 parts TA: 1 part LH.  I was also told that The New England Cheesemaking Company sells these with kosher certification, but after my first conversation with them several months ago and a very unhelpful representative, I didn’t feel like calling back to go through more questions about the starters.

Citric acid – I was able to buy this in the regular supermarket, also labeled as sour salt.  I happened to get mine by Liebers, but probably most spice companies carry this.

Calcium chloride – I was so happy to find something on the list that didn’t need kosher certification, and that was this.  I’ll pick this up tomorrow at a small pharmacy near the post office.

Lipase powder – of course I didn’t realize that I needed this until after I did all of my other research.  🙂  This also needs kosher certification, and I believe that The Dairy Connection sells this also; I’m going to call first thing in the morning and check this.  If they have it, I’ll ask them to tack it onto my order (I ordered the starters this afternoon and she told me would go out tomorrow so hopefully that will work).   ***Update – I called them about this, and the certification on the lipase is a Tablet K, which we don’t use.  I’m going to skip buying this – it doesn’t affect the consistency of the cheese, just the flavor.

Avivah

First step in cheesemaking – done

I’m feeling very, very busy with all the projects I want to do right away.  Today the kosher rennet I ordered for cheesemaking arrived, and the book on cheesemaking that I reserved also got to the library today.  I made a trip to the library with the kids this afternoon so I could pick it up immediately (I don’t go often – my husband picks up the books I order online on Sunday if I have something waiting – it’s efficient as far as gas and time). 

Once I got home, it was already dinner time, but I was thinking I’d be able to get a batch of cheese started before going to bed.  That was wildly wishful and unrealistic thinking, because besides the time involved in doing this for the first time, there’s the additional fact that it seems that I need either mesophilic or thermophilic starters for almost all of the cheese recipes.  That’s what’s nice about reading the book; you actually learn what you need to do! 

I don’t know if it will be easy to find or not – I know where to buy it within five minutes if it didn’t have to be kosher, but now I’ll have to spend some time on the phone making calls about it, finding out if this kind of thing needs to be certified kosher or not, and if so, where to get it.  It helps that dh is in the field of kosher supervision, because he has someone readily available to ask the questions he’s not sure about to. 🙂  But it still takes time.

I didn’t do the canning today that I said I was planning to do – I was too busy with lots of other things, beginning with standing on line for an hour waiting to vote.  (Not that I’m complaining – as I was standing there, I was thinking about how many people have fought for the privilege of voting in accordance with their beliefs.)  So that means I’ll have to can the soup that I planned to do today, tomorrow (though we ended up getting less than we expected, which means less canning for me!).

So the first steps have been taken towards cheesemaking – researched kosher rennet, called the manufacturers, called the supply company, ordered it, got the book, and bought 15 gallons of raw milk on Thursday to use – now I have to quickly get the starter I need so that I can use my milk while it’s fresh!  I guess worse comes to worst, we’ll drink the milk, and wait to make cheese for the next time I pick up raw milk, or try to make a batch with store milk (hormone free at least, though that’s far from ideal). 

I also ordered a bunch of small glass bottles with dropperlids, for others who may want to get some of the kosher rennet in a small amount from me.  I think I’ll have enough to split into 14 – 16 two ounce bottles, which seems to be the size generally sold for individual cheesemakers.  Unfortunately, there’s no source with kosher certification of regular sized containers, and the container size I bought (the smallest available) is intended for small cheesemaking companies – it’s enough for over one thousand gallons of milk!   Of course, letting people know it’s available and making those arrangements is another thing to take care of….but I never complain about being bored!

Avivah